Small Business
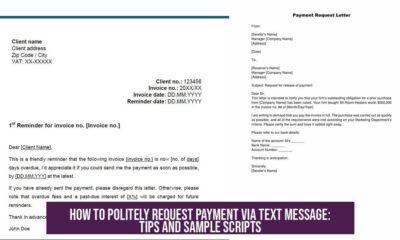
How to Send eSign Documents: Step-by-Step Guide and Best Tools
How to Send eSign Documents
Sending eSign documents involves uploading your document to an electronic signature platform, adding recipients, and specifying signing fields before sending it for signature. This process simplifies agreements and approvals by removing paper, printing, and physical mail.
Step-by-Step Process for Sending eSign Documents
- Choose an eSign platform: Select software such as DocuSign, Adobe Sign, or HelloSign. These platforms provide features to upload, prepare, and send documents securely.
- Upload your document: Upload files in formats like PDF, Word, or others supported by the platform.
- Add recipients: Enter the email addresses of signers and specify the signing order if needed.
- Prepare the document for signing: Drag and drop signature fields, date fields, initials, or checkboxes onto the document where signatures or inputs are required.
- Send the document: Once set up, send the document to recipients, who receive an email with a link to sign electronically.
- Track progress: Use the platform’s tracking tools to monitor who has signed and send reminders if needed.
- Download and store signed copies: After signing, download completed documents and keep them for records.
Requirements for Sending eSign Documents
- Internet connection: A stable internet connection is necessary for uploading, sending, and signing documents online.
- Valid email addresses: Recipients must have valid emails to receive signing invitations.
- Compatible device: Recipients can sign on desktops, tablets, or smartphones.
- Account setup (optional): Some platforms require senders or recipients to create accounts; others allow guest signing.
Popular Tools for Sending eSign Documents
| Tool | Key Features | Common Use Cases |
|---|---|---|
| DocuSign | User-friendly interface, workflow automation, multi-party signing. | Contracts, agreements, HR onboarding. |
| Adobe Sign | Integrates with Adobe Suite, customizable templates, compliance features. | Legal documents, sales agreements. |
| HelloSign | Simple integration, API support, audit trails. | Small businesses, freelancers, startups. |
Benefits of Sending eSign Documents
- Speeds up agreement turnaround time.
- Reduces paper waste and physical storage.
- Increases security with digital audit trails.
- Makes signing accessible anytime from any location.
Key Takeaways
- Upload and prepare documents with signature fields on an eSign platform.
- Send documents to valid email recipients for signing.
- Track signing progress and finalize completed documents.
- Use tools like DocuSign, Adobe Sign, or HelloSign based on needs.
- Ensure internet access and valid recipient contact info.
How to Send eSign Documents: A Clear Guide to Getting It Done
Wondering how to send eSign documents? You’re not alone. Electronic signatures are now a standard way to make agreements official—fast, secure, and paperless. But the process can feel mystifying if you’ve never done it before. Fear not! This guide takes you through the essentials of sending eSign documents, the smart way.
Let’s cut to the chase. At its core, sending an eSign document means sharing a digital file that requires someone’s signature electronically. This could be a contract, a lease, an approval form, or any document needing a signature. You upload it to a platform, drag and drop signature fields, invite signers, and voilà! The document gets signed online, no printing or scanning necessary.
Why Send eSign Documents in the First Place?
Aside from the obvious eco-friendly perks, eSign documents save incredible amounts of time. Remember the days of printing, signing with a pen, scanning, and emailing back or shipping? E-signatures cut that whole saga down to minutes. Plus, they’re legally valid almost everywhere, thanks to laws like ESIGN Act in the US and eIDAS in the EU. So, it’s not just faster; it’s trusted.
Ready to dig into the nitty-gritty? Keep reading.
Step-by-Step: How to Send eSign Documents
- Choose Your Document: First, identify the file you want signed. Typically, these are PDFs, Word documents, or other common formats.
- Pick a Platform: Although our provided content didn’t specify tools, popular options include DocuSign, Adobe Sign, HelloSign, and PandaDoc. Most have a free trial or free tier that’s fine for casual users.
- Upload Your Document: Once on your chosen platform, drag and drop your file into their web interface. Some allow direct import from cloud storage like Google Drive or Dropbox.
- Add Signature Fields: Here’s the magic. You place fields where recipients will click to sign, initial, date, or fill out other info. Some platforms automatically detect likely spots, speeding up the process.
- Specify Signers’ Emails: Add the email addresses of everyone who needs to sign. You can also set signing order if multiple signatures are needed stepwise.
- Personalize the Message: A quick note or instructions help avoid confusion. Remember, clarity is kindness.
- Send and Track: Hit send. The platform emails signers a secure link to the document. You often get notified when people open, sign, or decline.
- Download or Store: Once signed, download the fully executed document or let the platform store it securely. You have evidence, timestamps, and audit trails included.
Simple, right? But beware, details matter. Let’s highlight some important pointers.
Statements on Prerequisites and Preparation
Wondering what you need before sending eSign documents? No exotic gadgets required. All you need is:
- A digital copy of your document ready to be signed.
- Access to an electronic signature platform.
- The email addresses of the people who must sign.
- A reliable internet connection. This ain’t snail mail.
Also, make sure your document’s content allows eSignatures. Certain forms—like some notarized documents—might need extra steps or physical signatures.
Tools: Picking the Right Platform for Sending eSign Documents
Even though our supplied facts didn’t name specific tools, it’s helpful to know your options. Ready for a mini rundown?
| Platform | Free Tier | Best For | Unique Feature |
|---|---|---|---|
| DocuSign | Limited free trial | Businesses & enterprises | Strong legal framework compliance |
| Adobe Sign | Free trial (part of Adobe Cloud) | Creative professionals | Integrates with Adobe apps |
| HelloSign | 3 documents/month free | Indie users and small teams | Simple, clean interface |
| PandaDoc | 14-day free trial | Sales teams | Document analytics and payment integration |
Choosing the right tool depends on volume, budget, and integration needs. Don’t pick based on hype alone.
Addressing the Common Hiccups
Ever hit a snag sending eSign docs? You’re not alone. Issues might include:
- Recipients unsure how to sign.
- Emails landing in spam folders.
- Documents not formatted properly for signatures.
- Platform glitches or slow internet.
To dodge these problems, test the process yourself or with a coworker before sending to clients. Confirm email correctness and provide clear signing instructions.
Fun Fact: Did You Know?
The first legal eSignature in the US was executed in the late 1990s. That means people had to sign up to 30 years with old-school pen and paper. Technology truly takes time to catch on.
Wrapping Up: Your eSign Document Sending Checklist
- Prepare your document.
- Choose a trusted eSign platform.
- Upload and place signature fields smartly.
- Invite signers with clear instructions.
- Follow up and download the final signed document.
Electronic signatures are changing how we do business, making paperwork less of a headache. So, why wait? Jump in and start sending your eSign documents today. Does this sound like something your team could benefit from? How will adopting eSign change your workflow? Share your thoughts below!
How do I start sending an eSign document?
First, choose a platform that supports eSign. Upload your document there. Enter the recipient’s email to send a signing request.
Can I send eSign documents through email directly?
Yes, many eSign services let you send documents via email. The recipient clicks a link to review and sign electronically.
What information do I need to add before sending an eSign document?
Include the signer’s name and email. Specify where the signature is required on the document. Add instructions if needed.
Are eSign documents legally valid?
Yes, most eSign platforms comply with laws making electronic signatures valid and binding in many countries.
Can multiple people sign the same eSign document?
Many platforms allow multiple signers. You can set the signing order or let signers sign simultaneously.


Exploring the Vitamin Business Opportunity

The vitamin business opportunity lies in a rapidly growing global market with high demand, flexible regulatory requirements, and multiple viable business models. Entrepreneurs can capitalize on market expansion, diverse product lines, and evolving consumer needs. This industry offers several profitable avenues backed by solid growth trends and consumer health awareness.
Market Growth and Demand Dynamics
The global dietary supplement market reached a size of $167.5 billion in 2023. Experts predict a steady compound annual growth rate exceeding 7%, potentially pushing the market near $240 billion by 2028. This surge springs primarily from dietary gaps and immune health concerns. Many consumers turn to vitamins to offset nutritional deficiencies and improve wellness.
- Unhealthy diets drive persistent demand for supplements.
- Vitamins appeal to a wide demographic aiming to enhance immunity.
This expansive market creates fertile ground for newcomers and established brands alike.
Regulatory Landscape Advantages
The Dietary Supplement Health and Education Act (DSHEA) of 1994 significantly eased entry barriers by not requiring FDA approval for vitamin products. Instead, the FDA focuses on removing unsafe or illegal supplements after reaching the market. Entrepreneurs benefit from reduced regulatory hurdles but must remain vigilant about compliance to maintain credibility and safety.
| Aspect | Detail |
|---|---|
| FDA Approval | Not mandatory before sales |
| FDA’s Role | Identifies and removes unsafe/illegal products |
| Recommended | Stay updated on supplement laws |
Vitamin Business Ideas and Models
Launching a Private Vitamin Brand
Vitamins do not require FDA approval before sale, easing brand launch processes. Entrepreneurs can develop lines focusing on quality and organic ingredients to align with current trends. Starting with low-demand products reduces competition and can unlock untapped niches.
- Options include gummy vitamins, vitamin-infused drinks, and other innovative formats.
- White-label services simplify brand establishment by providing ready-made formulations.
Subscription Box Business
Regular supplement intake by consumers supports subscription box models that deliver monthly vitamins. Customization based on individual health needs enhances retention. Offering additional services like physician consultations strengthens customer trust.
- Wholesale pricing benefits improve margins.
- Add complementary products like skincare and medical supplies.
Pet Vitamin Products
The pet supplement segment focuses on animal health needs. Livestock and dairy farm operators often purchase supplements in bulk. Animal feed producers incorporate protein powders and vitamins as ingredients.
Supplements Retail Store
Entrepreneurs can operate online or physical specialty stores focusing on dietary supplements. In-person stores provide improved customer service and expert advice. Online dropshipping offers low startup cost and operational flexibility.
- Additional sales include protein snacks, workout gear, and gym apparel.
Steps to Pursue a Vitamin Business Opportunity
- Research: Study the niche, competitors, and compliance requirements. Consult legal experts.
- Planning: Develop a business plan incorporating goals, finances, risk management, and marketing.
- Partnerships: Secure reliable distributors and explore collaborations with gyms or health professionals.
- Marketing: Target audiences via social media, bundle offerings, and distinctive packaging.
- Adaptation: Use customer feedback to refine products and respond to market trends.
Profitability and Industry Potential
Vitamin businesses enjoy profit margins typically ranging from 30% to 50%. The large base of supplement users—about 75% of U.S. adults have taken supplements by 2020—sustains strong demand. The global market’s size and growth potential are compelling incentives for investment.
Main Product Categories
- Multivitamins
- Standalone vitamins
- Probiotics
- Mineral supplements
- Fatty acids
Wholesale Buying and Platform Support
Purchasing vitamins wholesale allows sellers to earn a retail margin. Platforms like BlueCart help connect suppliers with thousands of potential buyers. Automation tools on such platforms streamline order management and improve operational efficiency.
Key Takeaways
- The vitamin market is growing fast and forecasted to reach nearly $240 billion by 2028.
- FDA approval is not required for vitamin sales but regulatory compliance remains critical.
- Business models include private brands, subscription boxes, pet supplements, and retail stores.
- Profit margins typically range from 30% to 50%, with high consumer demand sustaining sales.
- Thorough research, solid planning, partnerships, and adaptable marketing drive success.
- Wholesale buying and digital platforms facilitate supply chain optimization and sales growth.
Unlocking the Vitamin Business Opportunity: Your Guide to a Thriving Supplement Venture
Is jumping into the vitamin business a smart move today? Absolutely. The dietary supplement market is booming, creating multiple doors for entrepreneurs ready to seize the opportunity.
Let’s dive into why this industry shines, what you need to know before you get started, and how you can craft a venture that’s both profitable and sustainable.
Why the Vitamin Business Market Is Buzzing
The vitamin and dietary supplement landscape has transformed dramatically over recent decades. Driven by a worldwide surge in wellness awareness, it’s a goldmine of possibilities. The global market clocked in at a staggering $167.5 billion in 2023 and is forecasted to climb toward $240 billion by 2028, maintaining an impressive growth rate above 7% annually.
Why such high demand? It boils down to people’s health habits. Many consume unbalanced diets or battle weakened immune systems, relying on supplements to fill nutritional gaps. This persistent need keeps the market humming, ensuring steady consumer interest and repeat business.
Navigating the Regulatory Maze
Thinking of launching your vitamin line? Good news: you don’t need FDA approval before selling dietary supplements. The passage of the Dietary Supplement Health and Education Act (DSHEA) in 1994 paved the way for a proliferation of supplement products, significantly loosening regulatory hurdles.
That said, there’s no free pass. The FDA retains authority to remove products deemed unsafe or falsely advertised. So, compliance with labeling and safety regulations remains essential. Hiring a legal expert to steer you through the specifics isn’t just a suggestion—it’s smart business.
Creative Business Models to Consider
The vitamin business isn’t a one-size-fits-all arena. There’s a buffet of options depending on your passion, capital, and market insight.
- Starting Your Own Brand: With no FDA pre-approval required, launching a brand is accessible. Focus on quality and organic ingredients to capture trend-conscious consumers. Starting with lower-demand products can reduce competition and boost your chances. Innovative twists, like gummy vitamins or vitamin-infused beverages, can differentiate your offerings. White-label options simplify brand creation by letting you rebrand existing products.
- Subscription Boxes: Supplements thrive on regular usage. Offering a subscription service taps into this, delivering customized vitamins right to consumers’ doors. Adding perks like free consultations with physicians adds value, making customers stick around. Plus, buying wholesale allows for attractive margins. Throwing in medical supplies or skincare items can widen appeal and increase revenue streams.
- Pet Vitamins: Don’t forget our furry friends! The animal supplement market is sizable and growing. Businesses in animal husbandry or dairy farming look for wholesale supplement supplies to boost livestock health. Similarly, animal feed manufacturers integrate supplements like protein powders into their products. Pet vitamins offer a unique angle in this space.
- Supplement Stores: Whether online or physical, specialty stores cater to customers seeking personalized advice and immediate purchases. Brick-and-mortar outlets shine with their customer service edge. Online stores can leverage dropshipping for lower startup costs and greater flexibility. Selling complementary products such as protein bars, workout gear, and gym apparel can enhance profits.
Five Phases to Launch Your Vitamin Business Successfully
Before you pour cash into bottles and labels, follow these phases for a well-rounded start.
- Research: Comprehensive niche and competitor analysis is your foundation. You also need a thorough understanding of all legal regulations. Hiring a professional lawyer knowledgeable in dietary supplement law is often worth the investment.
- Planning: A detailed business plan guides you. Outline your goals, financial forecasts, marketing strategy, and potential risks. Consider a risk management plan to navigate inevitable bumps.
- Partnerships: Secure reliable distributors early. Collaborate with related businesses like gyms or fitness coaches who can help push your product through consignment deals. Early B2B sales can fund your next steps.
- Marketing: Marketing isn’t just helpful—it’s crucial. Pinpoint your audience, leverage social media, and design eye-catching packaging that complies with the law. Offer bundle deals and discounts to attract customers initially and keep them coming back.
- Adapt and Improve: The market never stands still. Constantly adjust to changing consumer needs and new trends. Customer feedback is your treasure trove for product improvement and customer satisfaction.
What Makes Vitamin Businesses Profitable?
The economics of this industry are enticing. Typical profit margins hover between 30% and 50%. Combine this with broad market demand—statistics show around 75% of U.S. adults tried dietary supplements at least once in 2020—and you’ve got powerful market potential. An expanding audience and high repeat purchase behavior create a rock-solid business foundation.
Core Products to Include in Your Portfolio
Knowing what to sell helps streamline your efforts. The big five product categories generally include:
- Multivitamins
- Standalone vitamins (like Vitamin D or C)
- Probiotics
- Mineral supplements
- Fatty acids (Omega-3, for example)
Hitting these categories covers a wide spectrum of consumer needs and preferences.
Boosting Your Vitamin Venture with Wholesale and Technology
Buying wholesale improves your cost efficiency, allowing you to sell at retail prices competitively. Platforms like BlueCart simplify the supply chain by connecting you with thousands of suppliers and customers. Their tools also automate repetitive tasks, helping you focus on growth rather than admin headaches.
Final Thoughts: Is the Vitamin Business Opportunity Right for You?
With wellness booming and consumers hungry for supplements, it’s an exciting time to jump in. That said, success hinges on smart research, legal savvy, strong partnerships, and savvy marketing. The opportunities stretch from niche organic brands to subscription models, pet supplements, and beyond.
So, is it time to invest your entrepreneurial energy into vitamins? If you’re ready for a blend of health passion, business grit, and customer focus, the market is wide open—and waiting.
What’s your next step?
What makes the vitamin business a growing opportunity?
The dietary supplement market is expanding rapidly. With over $167 billion in sales in 2023 and projected growth of 7% annually, demand for vitamins continues to rise globally.
Can I start a vitamin brand without FDA approval?
Yes, dietary supplements do not require FDA approval before selling. However, the FDA can remove unsafe products. Compliance with other regulations is necessary.
What are some viable vitamin business models?
- Launching a private label brand focusing on quality ingredients.
- Subscription box services offering customized supplements.
- Pet vitamin products for animal health markets.
- Supplements retail stores online or physical locations.
How critical is market research before starting a vitamin business?
Thorough research is essential. Understanding competitors, the target market, and legal regulations helps reduce risks and positions your business better.
What marketing strategies work best for vitamin businesses?
Social media marketing targeting health-conscious consumers is key. Partnering with gyms, fitness trainers, or influencers can boost brand visibility and sales.
How Marketing Lets Marketers Place Ads on Websites with Search Engines
Marketing lets marketers place ads on websites with search engines through Search Engine Marketing (SEM), a paid digital advertising method that helps businesses appear prominently on search engine results pages (SERPs). SEM drives visibility by bidding on relevant keywords and displaying ads when users enter search queries tied to those words. This method uses a pay-per-click (PPC) model where marketers pay only when a user clicks an ad.
Understanding Search Engine Marketing (SEM)
SEM is the process of boosting a brand or product’s visibility in search engines like Google, Bing, or Yahoo through paid ads. It focuses on placing ads in response to user search queries, giving businesses a chance to reach potential customers actively searching for products or services they provide.
- Advertisers bid on keywords related to their offering.
- Ads appear alongside organic search results, typically at the top or bottom.
- SEM strictly involves paid ads, distinguishing it from search engine optimization (SEO), which targets unpaid, organic search rankings.
How SEM Works — The Mechanics
Advertisers enter an ad auction on the search engine platform. Google Ads, for example, evaluates ads based on two main factors: bid amount and Quality Score. Quality Score measures an ad’s relevance to the targeted keyword and overall user experience on the landing page.
Ad placement depends on:
- Keyword Relevance: Ads match the user’s search terms to ensure alignment.
- Bid Value: The amount an advertiser is willing to pay per click influences ad rank.
- Quality Score: Higher scores reduce cost-per-click (CPC) and improve ad position.
Advertisers can target audiences intricately by location, device type, and time of day or week, making SEM flexible and precise.
The Role of SEM in Marketing Strategies
SEM helps businesses show ads to users when they have high intent to purchase. This intent-driven method is beneficial for:
- Small, medium, and large businesses.
- Immediate exposure to potential customers.
- Driving website traffic and increasing leads or sales.
Using SEM, marketers place ads that appear on search engine results pages and other websites affiliated with the search engine’s advertising network, connecting products and services directly with interested users.
Benefits of Using SEM for Advertisement
- Targeted Reach: Ads appear to users based on keywords, geography, device, and time.
- Pay-Per-Click Model: Advertisers pay only when a user clicks an ad, optimizing the ad spend.
- Real-Time Adjustments: Campaigns can be modified or paused instantly based on performance data.
Key Components of SEM Ads
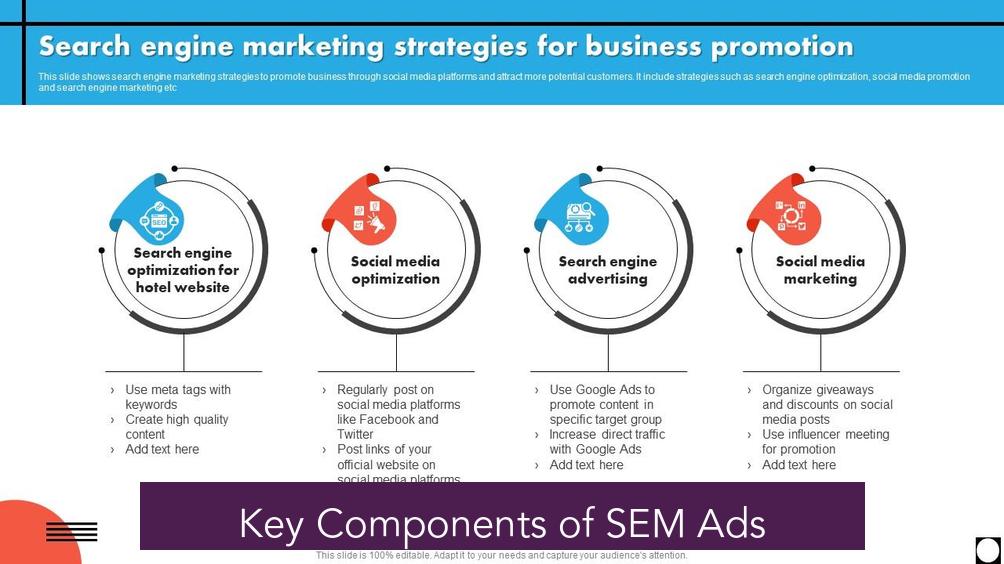
| Component | Description |
|---|---|
| Headline | The clickable blue text users see on search results |
| Description | Short text below the headline providing details |
| Extensions | Additional links or call-to-action buttons |
| Landing Page | The web page users are directed to after clicking the ad |
Proper keyword research is critical for SEM success. Tools such as Semrush, Google Ads Keyword Planner, and Google Trends help marketers identify valuable keywords and analyze competition and trends.
SEM Platforms and Comparison with SEO
- Platforms: Google Ads is the leading platform, with Microsoft Advertising and Yahoo! Native as alternatives.
- SEM vs. SEO: SEM buys ad placements for immediate traffic, while SEO is a longer-term strategy to improve organic rankings without direct payment for placements.
Costs and Budgeting for SEM
SEM budgets vary widely based on goals and industries. Small campaigns might cost around $500 monthly, while larger efforts exceed $10,000. The cost per click ranges from $2 to over $55 depending on keyword competition and industry.
Marketers can adjust spending throughout campaigns to optimize ROI. High competition keywords require higher bids to appear on the first page of search results.
Key Takeaways
- SEM allows businesses to place pay-per-click ads on search engine results and associated websites.
- Advertisers bid on keywords, with ad rank influenced by bid and Quality Score.
- Targeting options include location, device, and time, increasing ad precision.
- SEM provides measurable, flexible campaigns that can be adjusted in real time.
- Cost varies by industry and keyword competitiveness, with budgets ranging from hundreds to thousands monthly.
How Marketing Lets Marketers Place Ads on Websites with Search Engines
Marketing that lets marketers place ads on websites with search engines is known as Search Engine Marketing (SEM). It involves placing paid advertisements on search engines like Google or Bing to help businesses get in front of potential customers when they are actively searching. SEM makes sure ads show up where and when users are looking for products or services, driving traffic and sales in a highly targeted and cost-efficient way.
Now, let’s unravel the nuts and bolts of this fascinating world where ads meet search engines—and why it’s vital for any business hoping to thrive online.
What Exactly Is Search Engine Marketing?
Search Engine Marketing, or SEM, is a strategy that uses paid advertising to boost your visibility on search engine results pages (SERPs). Unlike SEO, which focuses on organic ranking through website optimization, SEM buys prime ad real estate through paid placements.
SEM targets specific keywords that people type into search engines. When you bid on these keywords, your ad could appear above or alongside organic results, shining bright like a lighthouse amid the ocean of search results.
Here’s a quick fact: SEM used to cover both organic and paid strategies, but these days, it’s strictly the paid side of things, where you pay every time a user clicks your ad—known as pay-per-click (PPC).
Why Is SEM a Big Deal for Marketers?
Picture this: customers searching for the exact product or service you offer. SEM helps place your ads precisely at that moment. It’s like waving a flag saying, “Hey, I’m right here!” on the busiest street in your target market.
Search engines have become the primary way people discover new stuff online. Without a strong SEM strategy, your business is hiding in plain sight—or worse, invisible. SEM is crucial because it gets your brand noticed with laser-focused targeting and measurable results.
What’s more, you only pay when someone clicks your ad. That means you’re spending your dollars efficiently, reaching people who already have the intent to buy or learn more.
The Perks of Placing Ads via SEM
SEM offers some compelling advantages that make it a go-to marketing technique:
- Intent-Driven Advertising: Because users are actively searching, your ads meet them with high intent. It’s like catching fish right when they’re hungry instead of casting in empty water.
- Speedy Results: Unlike SEO, which takes time to build organic traction, SEM can drive visible traffic almost immediately. Great for startups or new product launches.
- Real-Time Control: You get instant data on ad performance. If a campaign flops, turn it off instantly. No sunk cost syndrome here.
- Precise Targeting: Beyond keywords, you can target by location, device types, time of day, and even seasons. Imagine your ad popping only when your audience is sipping coffee at 9 AM on a Tuesday.
What’s Inside a Search Ad?
Wonder what an actual search ad looks like? It’s simpler than you think but powerful:
- Headline: The clickable blue title that grabs attention.
- Description: A brief text snippet that highlights your offer or message.
- Extensions: Extra links or actions, like phone calls or location info, inviting more engagement.
- Landing Page: Where users land after clicking—make sure this page seals the deal!
The headline hooks them, the description persuades them, and the landing page closes the deal. This is SEM’s magic pipeline working seamlessly.
How Does SEM Work Behind the Scenes?
Amazing as it sounds, placing these ads isn’t random. SEM follows a precise process:
- Keyword Research: Marketers find popular, relevant search terms their potential customers use.
- Bid on Keywords: Advertisers enter ad auctions, offering money for placements tied to those keywords.
- Quality Score: Google evaluates ads based on relevance and usefulness. The better your ad fits the keyword, the higher the score, which means lower costs per click (CPC).
- Ad Placement: Google picks winners for slots based on Quality Score and bid price.
Think of it like an auction but with a twist: you pay for clicks, not just views. Even winning your bid won’t get you the top spot if your ad is off-topic or poorly constructed.
How Much Does SEM Cost?
Curious about the price tag? SEM budgets can vary as widely as your neighbor’s taste in home décor—from a modest $500 up to $10,000+ per month depending on competition.
Some industries have sky-high costs per click—think legal or insurance sectors where CPC can soar past $50! Others enjoy bargain rates around $2.
The secret sauce? Keyword competitiveness. If everyone wants the same search term, prices skyrocket. Sometimes you’ll spend more to outbid competitors just to sit on page one.
Tools of the Trade: Helping Marketers Play the SEM Game
Luckily, marketers aren’t flying blind into the SEM jungle. A handful of savvy tools make lives easier, smarter, and more cost-efficient:
- Semrush: Offers end-to-end SEM management—from keyword digging to competitor spying.
- Google Ads Keyword Planner: Perfect for kicking off campaigns with targeted keyword ideas.
- Google Trends: See how keyword popularity changes over time to time your campaigns wisely.
These tools equip marketers to pick the right keywords, optimize bids, and analyze performance like seasoned pros.
How Does SEM Differ from SEO?
SEO and SEM often get tangled in the same conversation but they’re fundamentally different beasts:
- SEM: Paid ads that appear at the top or bottom of search results.
- SEO: Techniques to organically rank your website in search engine results, without paying for clicks.
SEO takes patience and effort. It’s like planting a tree and enjoying shade years later. SEM is turning on a searchlight instantly—but it costs per use.
So, which is better? Depends on your goals. Many savvy marketers combine both to maximize reach and balance short-term wins with long-term growth.
Is Google Ads the Same as SEM?
Not quite. Google Ads is the most popular platform for running SEM campaigns but SEM itself refers to the overall strategy and practice of paid search advertising.
Think of SEM as the game, and Google Ads as one of the playing fields. Other platforms exist too, like Microsoft Advertising and Yahoo! Native ads.
FAQs About Marketing on Search Engines
- Is Facebook SEM? No, Facebook is a social media marketing platform. SEM is specific to paid ads on search engines.
- Are SEM tools secure? Good question! Top SEM tools prioritize security with updates, intrusion detection, and data encryption.
Bottom Line: SEM Powers Targeted Website Advertising
So there you have it—marketing that lets marketers place ads on websites with search engines, aka SEM, is a cornerstone of modern digital marketing. It connects businesses to customers actively searching for what they need, using a smart, cost-effective paid advertising approach.
With its precise targeting, real-time measurability, and speedy results, SEM levels the playing field for businesses of all sizes who want to get noticed online. Plus, the combination of powerful tools and flexible budgets means marketers can tailor campaigns to squeeze every drop of value from their ad spend.
Whether you’re a start-up itching to get your name out there fast, or a giant ready to dominate search rankings, SEM offers an unbeatable way to place your ads exactly where your customers are looking. Have you tried SEM in your marketing mix yet? What’s holding you back?
What is search engine marketing (SEM) and how does it help place ads on websites?
SEM is paid advertising that boosts your brand’s presence in search engine results. It lets marketers place ads on search engines like Google, showing products or services when users search relevant keywords.
How does SEM use keywords to target potential customers?
SEM targets specific keywords related to your product or service. Ads appear when users search those words, with costs depending on keyword competitiveness and relevance, measured by Quality Score.
What is the pay-per-click model in SEM advertising?
In SEM, advertisers pay only when someone clicks their ad. This pay-per-click (PPC) system helps control costs and ensures budget is spent on actual customer engagement.
Can SEM ads be targeted by location and device?
Yes, advertisers can specify where, when, and on which devices their ads appear. Campaigns can be geo-targeted, device-targeted, or scheduled for specific times to reach the right audience.
How does SEM allow marketers to measure and adjust their ad campaigns?
SEM platforms provide real-time data on clicks and conversions. Marketers can track ad performance and quickly change or pause campaigns to improve results or cut losses.

How to Leave a Review on Google for a Business
Leaving a review on Google for a business involves logging into your Google account, searching for the business, selecting the review option, giving a star rating, and writing your experience before submitting it. This process is simple and fast, enabling customers to share honest feedback that benefits both consumers and businesses.
What Are Google Reviews?
Google reviews provide verified customer opinions in one place, consolidating location, hours, phone details, and user feedback. Over 84% of consumers trust online reviews as much as personal suggestions from friends or family. Positive Google reviews can improve a business’s ranking in search results and attract more customers.
Step-by-Step Guide to Leave a Google Review
- Log in to Your Google Account:
Use the blue login button on the Google homepage’s top right to sign in. Enter your email and password. If you don’t have a Google account, you must create one first. - Find the Business:
Type the company name in the Google search bar or open Google Maps and locate the business. On mobile devices, open the business listing on Google Maps, then tap “Rate & write a report.” - Select “Write a Review”:
On the business profile, you will see existing star ratings and reviews. Click the button labeled “Write a review” to start your own. - Choose a Star Rating:
Rate from 1 star (poor service) to 5 stars (excellent). Each star level reflects your level of satisfaction. - Write Your Review:
Enter your experience or opinion in the text box. Describe your interaction clearly and honestly. - Submit Your Review:
Click “Publish” to post your review publicly on Google.
Important: Reviews written using the same device or network as the business may not display. This restriction helps prevent fake ratings.
Quick Guide Summary
- Log into Google or Google Maps.
- Search for the business.
- Scroll to “Write a Review.”
- Select star rating.
- Write your review.
- Click send or publish.
You’ve now contributed a Google review.
Why Timely Google Reviews Matter
Fast feedback helps businesses adjust quickly to customer needs. Writing a review takes moments unless you choose to write extensively. When customers know how to leave a Google review, businesses can encourage positive feedback effectively.
Additional Insights About Google Reviews
How to Get More Google Reviews
Encourage satisfied customers to write reviews. Ask politely after a good interaction or at purchase points. Incentives are discouraged by Google policies, so focus on genuine requests.
Can Non-Customers Leave Reviews?
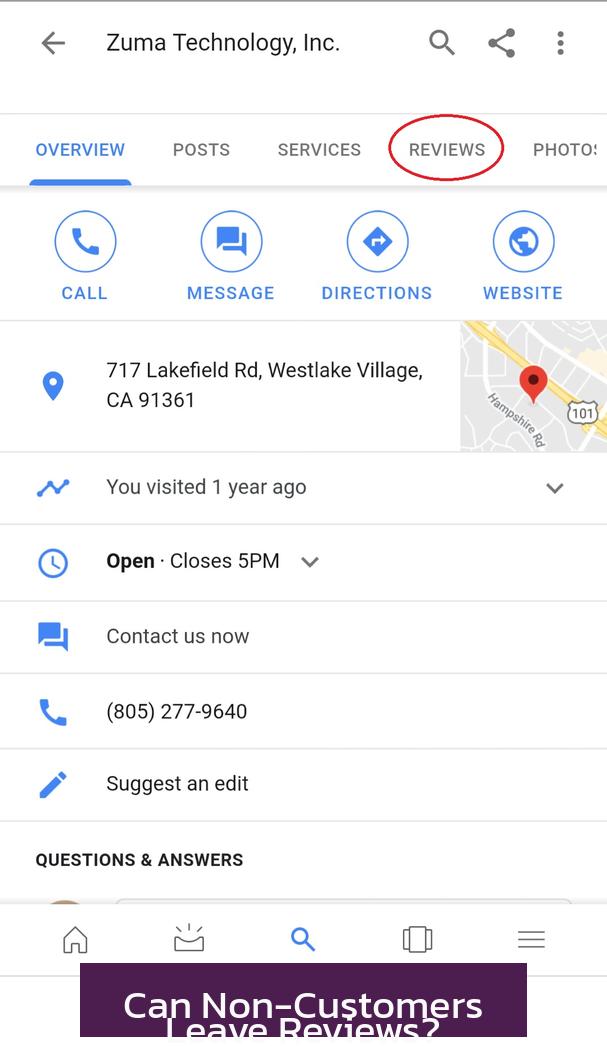
Generally, rating a business without using its services is not allowed and may result in removal of the review. For example, you cannot claim a poor haircut if you never visited the salon.
External Experience Reviews by Non-Customers
Non-customers can provide feedback based on indirect interactions, such as phone inquiries or website impressions, as long as the statements are truthful and factual. Examples include commenting on website usability or customer service responsiveness.
Summary: Key Points on Leaving Reviews
- Log into Google account first.
- Search the business on Google or Maps.
- Click “Write a review,” give stars, and write your feedback.
- Publish the review to share it publicly.
- Reviews from non-users based on false claims can be removed.
- Timely direct feedback helps businesses improve.
How to Leave a Review on Google for a Business: A Step-By-Step Guide
Want to share your thoughts about a business on Google but unsure where to start? How to leave a review on Google for a business is straightforward once you learn the steps. Google reviews pack a punch—they combine a business’s info, photos, hours, and feedback all in one place.
With 84% of consumers trusting online reviews as much as personal recommendations, your review can shape someone’s choice. Plus, businesses with positive reviews tend to rank higher on Google Search, getting them more customers (and more reasons for you to write those five stars!). Wondering how to make your review count and actually publish it? Let’s dive in.
Logging In: Your First Step to the Review Stage
First off, you need to be signed into your Google account. Don’t have one? No worries, it’s free and quick to set up. Just click the blue “Login” button in the top right corner of Google’s homepage, enter your email and password (or create a new account), and voila—you’re in.
Think of this as your virtual passport to the land of reviews. Google needs you logged in to ensure your feedback is legit and uniquely tied to a real person. This helps reduce fake reviews, although sometimes it can block genuine ones if, say, the business and reviewer share the same network or device.
Finding the Business You Wish to Review
Once logged in, fire up the search bar. Type the exact name of the business, restaurant, or attraction you want to review. Want to feel a bit more like a detective? Use Google Maps or the Google+ platform (yes, it’s still around in some fashion for reviews).
On a mobile device? Tap the service provider on Google Maps, then hit the button labeled “Rate & write a report.” It’s like knocking on their digital door and being invited inside to share your opinion.
Spotting the Right Spot: Writing Your Review
After searching, you’ll see the business’s profile pop up. Browse existing ratings and comments first for perspective. Found the right place? Click the “Write a review” button.
Here’s where the magic happens. The rating system has two parts:
- Stars: Click on 1 to 5 stars—1 means “not-so-great” and 5 means “wow, highly recommend.”
- Text field: Share a few lines or paragraphs about your experience. You’re the storyteller here. Feel free to mention anything from customer service to ambiance or product quality.
Done? Hit “Publish” to share your thoughts with the world (or at least with anyone who Googles the business). Just a heads-up: Reviews may sometimes fail to display if Google suspects a conflict of interest, like reviews written from the same IP network as the business, but that’s to keep things fair and genuine.
The Quick and Dirty Guide to Posting Your Review

- Open your web browser or Google Maps app on your phone.
- Sign in to your Google account.
- Search for the business you want to review.
- Scroll down to find “Write a Review” next to the Reviews and Add Photo buttons.
- Click “Write a Review”.
- Pick your star rating.
- Jot down your experience or opinion.
- Hit send and bask in the glory of having left your mark!
That’s it. No rocket science involved. Have you ever thought it’d be so simple to make a difference in a business’s online reputation?
Why Bother With Reviews? Why Is Quick Feedback So Important?
Leaving a Google review isn’t just about venting or praising—it’s about shaping real-time customer feedback. This info helps businesses improve and helps future customers make informed choices.
Plus, a speedy review after your visit helps keep your feedback fresh and relevant, which businesses love. It’s probably the easiest and fastest part for you as a reviewer; everything else is just celebrating your new Internet fame.
Frequently Asked Questions: Clearing Up Confusions About Google Reviews
How Can Businesses Get More Google Reviews?
It’s often simple: ask! Businesses that politely encourage happy customers to leave reviews usually see an uptick. Understanding what motivates customers to review helps tailor these requests to feel natural and welcome.
Can Non-Customers Leave Reviews?
Strictly speaking, no. Google expects a reviewer to be a genuine customer to prevent fake or misleading feedback. For example, someone can’t review a haircut if they didn’t get a haircut there—that’s fraudulent.
But Wait, Non-Customers Can Still Say Something?
Yes! If you never bought the product or service but interacted with the business, like asking questions or browsing their website, you can share your external experience. Maybe their website was confusing or an email went unanswered. Your comments must be truthful, but this kind of feedback is allowed.
This adds nuance to reviews, reflecting the full picture of the business beyond just transactions.
Final Thoughts: Your Review Matters
Leaving a review on Google for a business is more than just clicking stars and typing. It’s a powerful act that influences future customers and drives businesses to improve. The process is simple, fast, and gives your voice a platform. Next time you have a memorable experience, good or bad, why not take a minute to share it?
Does the idea of influencing a business’s future sound exciting? Have you ever left a review that changed how others thought about a place? Your next review might just be the one that helps a great business shine or nudges another toward better customer care.
How do I start leaving a Google review for a business?
First, log in to your Google account. If you don’t have one, create a new account. Then, search for the business using Google Search or Google Maps. When you find it, click “Write a review” on its profile.
What steps should I follow to submit my review?
- Select the star rating from 1 to 5.
- Write your opinion in the text field.
- Click the “Publish” button to post your review.
Your review will appear on the business’s Google profile after publishing.
Can I leave a review if I am not a customer of the business?
Non-customers cannot post false claims as reviews. However, they can leave factual feedback about external experience, like website usability or customer service, as long as it is true and accurate.
Why might my Google review not be displayed?
If you use the same device or network linked to the business, your review may not show. This helps prevent fake reviews and keeps the rating trustworthy.
How can a business encourage customers to leave Google reviews?
Businesses can ask satisfied customers directly to leave a review. Knowing why customers leave reviews helps improve the chances of getting positive feedback on Google.

What is the lowest salary for a pharmacist?

What Are the Costs Involved in Registering a Trademark and Key Factors to Consider
How to Send eSign Documents: Step-by-Step Guide and Best Tools

Customer success manager career path

Streaming Music in Malls: Strategies to Enhance Shopper Experience and Boost Business Performance

Vitamin Business Opportunity: Market Growth, Models, and Profit Strategies

How Search Engine Marketing Enables Marketers to Display Ads on Websites

How to Leave a Google Review for a Business: Step-by-Step Instructions
What Are the Costs Involved in Registering a Trademark and Key Factors to Consider
Streaming Music in Malls: Strategies to Enhance Shopper Experience and Boost Business Performance
-
 Career3 years ago
What is the lowest salary for a pharmacist?
-
 Small Business9 months ago
What Are the Costs Involved in Registering a Trademark and Key Factors to Consider
-
 Career3 years ago
Customer success manager career path
-
 Small Business9 months ago
Streaming Music in Malls: Strategies to Enhance Shopper Experience and Boost Business Performance
-

 Career Path3 years ago
Is oilfield services/equipment a good career path
-

 Career3 years ago
What is the highest paying customer service?
-

 Customer Service3 years ago
What is the highest paid customer service job?
-

 Customer Service3 years ago
Onsumer services a good career path