Small Business
What SBAD TREAS 310 Misc Pay Means and How to Verify Its Legitimacy
Understanding SBAD TREAS 310 MISC PAY
SBAD TREAS 310 MISC PAY commonly appears as a transaction label on bank statements. It typically represents a payment processed by the U.S. Department of the Treasury linked to Small Business Administration (SBA) activities. This label often corresponds to Economic Injury Disaster Loan (EIDL) disbursements, including both grants and loans.
What SBAD TREAS 310 Means
The code SBAD TREAS 310 specifically denotes a Small Business Administration disaster relief payment. It is frequently associated with the COVID-19 pandemic relief efforts that sought to support small businesses. The payments may show as ‘ACH Credit SBAD TREAS 310 – MISC PAY’ on bank statements.
These payments are part of the SBA’s Economic Injury Disaster Loan program. The program provides financial assistance to businesses experiencing economic difficulties due to disasters. The “MISC PAY” label usually means the payment is a miscellaneous credit, often an advance or grant portion of the total loan.
Relation to Economic Injury Disaster Loans (EIDL)
The SBAD TREAS 310 payments often serve as advances or grants within the EIDL framework. Typically, businesses received two types of payments:
- Smaller initial advances, which are grants and do not require repayment.
- Larger subsequent loans that must be repaid over a period, usually up to 30 years, usually with interest.
This distinction is critical. The initial grant offsets part of the financial loss caused by the pandemic without adding debt burden. The loan portion supports longer-term recovery but involves repayment obligations.
Examples of Payment Flow
| Payment Type | Description | Repayment |
|---|---|---|
| SBAD TREAS 310 Misc Pay (Grant) | Initial advance payment from SBA during COVID-19 relief | No repayment required |
| EIDL Loan Payment | Larger loan to be repaid over up to 30 years | Repayment with interest |
Verifying Payment Legitimacy
Receiving an SBAD TREAS 310 payment warrants verification. Small businesses should confirm the source to avoid potential fraud. Financial institutions and private sector partners have reported scams involving fraudulent SBA-related payments.
Checking with your bank and verifying details on the SBA official portals helps confirm if the transaction is legitimate. Legitimate payments will come from the U.S. Department of Treasury and align with your EIDL application status.
Signs to Verify:
- Matching payment description (‘SBAD TREAS 310 – MISC PAY’) on bank records.
- Correspondence from SBA or treasury confirming payment details.
- Matching amounts with approved advance or loan funding.
Accounting and Tax Implications
From an accounting perspective, EIDL payments have distinct treatments:
- The grant components (advances) are typically excluded from taxable income as per CPA guidance.
- Loans should be recorded as liabilities and repaid based on agreed schedules.
- If loan funds pay contractors or third parties, those expenses are deductible according to tax rules.
Businesses must maintain clear records to ensure proper treatment during financial audits or tax filing. Consulting a tax professional familiar with SBA loans is advised.
Context and Pandemic Background
The SBAD TREAS 310 payments gained prominence during the COVID-19 pandemic. To assist struggling small businesses, the government launched EIDL programs offering both grants and loans. Many businesses relied on these funds to stay afloat amid shutdowns and economic uncertainty.
The two-step payment approach—initial grant followed by loan—helped provide immediate relief and long-term support.
Potential for Fraud
Businesses should remain cautious. Fraud schemes imitating SBA payments surfaced during this period. Always verify bank transactions and official communications to avoid falling victim.
Key Takeaways
- SBAD TREAS 310 MISC PAY indicates an SBA disaster relief payment, often part of the EIDL program.
- Initial payments are usually grant advances, not requiring repayment; later payments are loans repayable over up to 30 years.
- Verify all payments to prevent fraud and confirm legitimacy with the SBA or your bank.
- Grant amounts are excluded from taxable income; loans must be accounted for as liabilities.
- The payments originated mainly during COVID-19 to support small businesses affected by the pandemic.
Unpacking the Mystery of SBAD TREAS 310 MISC PAY: What You Need to Know
Picture this: you check your bank account and, to your surprise, there’s a mysterious deposit labeled SBAD TREAS 310 MISC PAY. No memo, no warning—just a cryptic string of letters and digits that sparks questions. “What on earth is this? Am I a lottery winner? Or worse, a target of fraud?”
Here’s the good news: while it may initially feel like decoding a secret government cipher, this payment label has a clear explanation—one tied closely to the U.S. government’s efforts to support small businesses and individuals, especially during hard times. Let’s break down everything you need to know about SBAD TREAS 310 MISC PAY, so you recognize it, respond appropriately, and even leverage its benefits if it applies to you.
What Exactly Is SBAD TREAS 310 MISC PAY?
The payment labeled “SBAD TREAS 310 MISC PAY” is typically a transaction made by the U.S. Department of the Treasury, linked specifically to the Small Business Administration (SBA)’s financial relief efforts. That’s the official gist. But why does it appear, and what kind of support does it represent?
This label often shows up on bank statements when the SBA disburses funds. Most commonly, it is related to the Economic Injury Disaster Loan (EIDL) program or other SBA grants designed to provide financial aid during crises, like the COVID-19 pandemic.
The treasury code helps banks and recipients identify these payments as government-backed support. If you spot this descriptor on an ACH deposit, it’s a clue pointing toward SBA disaster assistance rather than, say, a tax refund or random deposit.
The Purpose Behind the Payment: Disaster Relief and SBA Loans
- Relief for Small Businesses: Many businesses faced unprecedented challenges during events like COVID-19. SBAD TREAS 310 payments often represent SBA Economic Injury Disaster Loans or related grants that offer them a lifeline.
- ‘Advances’ or Grants: The initial payments under this label frequently reflect advance funds, which are actually grants. These do not require repayment and help businesses with immediate cash flow needs.
- Loans That Matter: The larger EIDL loan amounts—distinct from the initial advances—do need repayment within a timeline, often spanning up to 30 years. They come with interest but offer flexible terms designed to help businesses survive.
- Individual Assistance: While mostly tied to businesses, these payments can also relate to federal disaster relief for individuals, helping with home repairs, property replacement, or other recovery efforts.
Imagine, for a moment, a small bakery that suddenly lost half its sales during the pandemic. The SBAD TREAS 310 MISC PAY entry would mark the government sending them critical financial support—often within days—to cover rent, utilities, or payroll. Sudden, unexpected, but hugely impactful.
How to Spot and Validate SBAD TREAS 310 Payments in Your Records
Seeing “ACH Credit SBAD TREAS 310 – MISC PAY …” on your bank statement is the first hint. Don’t automatically panic or rejoice. Instead, cross-check this payment against any communication from the SBA or Treasury. Look for emails, mailers, or online account notes referring to EIDL advances, grants, or loans.
If something doesn’t add up—or you get multiple unrecognized deposits with this label—you must investigate. Fraudsters occasionally spoof these codes to trick consumers into accepting fake payments. Always verify legitimacy before considering the money yours to keep.
Accounting and Tax Implications: Managing SBAD TREAS 310 Payments
For business owners and accountants, tracking these payments carefully is crucial. Why? Because the financial nature of SBAD TREAS 310 funds impacts tax reporting and accounting entries differently depending on whether it’s a grant or a loan.
- Grants vs. Loans: Grants or advances under SBAD TREAS 310 are often classified as income. Loans, however, are liabilities on your balance sheet until repaid. Your financial software should accurately reflect this distinction to maintain clean books.
- Allocation of Funds: If these payments are designated for payroll or operational costs (common under forgivable loan programs), record those expenses meticulously. This helps justify forgiveness eligibility and satisfy SBA requirements.
- Tax Treatment: According to IRS rulings like Notice 2020-32, forgiven PPP loans and certain disaster grants aren’t taxable income. However, this area can be complex. Businesses must be mindful that expenses covered by forgiven loans might not be deductible, a subtle but important nuance.
If you’re unsure, a session with a tax professional or CPA familiar with SBA programs will help ensure compliance and optimize your tax position. Missteps in classification or reporting might invite scrutiny or audits.
Handling Payment Errors and Potential Fraud Concerns
Not every payment tagged SBAD TREAS 310 is legitimate. Mistakes happen, and fraud attempts have increased involving SBA disaster payments. What should you do if you suspect something fishy?
- Verify the Details: Compare the payment amount, date, and reference with official SBA notices or loan agreements.
- Contact the SBA or Treasury: Reach out promptly for clarity. The SBA has helplines and online portals specifically for EIDL and PPP inquiries.
- Document All Communications: Keep records of calls, emails, and any instructions received. This may prove invaluable if you need to resolve disputes or return funds.
- Seek Professional Help: Accountants and financial advisors can help you navigate errors, understand implications, and liaise appropriately with government agencies.
Remember, returning mistakenly received funds promptly avoids legal consequences and demonstrates good faith. Conversely, ignoring suspicious payments can lead to unintended liabilities or legal trouble.
SBAD TREAS 310 vs. TREAS 310: What’s the Difference?
While both codes denote government payments, they serve different routes. “TREAS 310” is often seen with IRS-related transactions—like tax refunds or stimulus payments. Meanwhile, “SBAD TREAS 310” zeroes in on SBA’s disaster relief dispersals.
This distinction is subtle yet important. Recognizing it ensures that business owners and individuals channel inquiries and record-keeping to the correct agencies and tax treatments.
A Recap: Why This Matters to You
Getting a SBAD TREAS 310 MISC PAY deposit can feel like finding an unexpected $100 bill in your pocket. But it’s not just luck—it’s the government stepping in, often during rough economic spells, with a helping hand.
Here’s what every recipient should keep in mind:
- Identify the payment promptly and confirm it originated from the SBA or Treasury.
- Understand if it’s a grant (no repayment needed) or a loan (repayment required over time).
- Allocate and record the funds accurately within your accounting or personal finances.
- Consider tax implications and consult with professionals if needed to ensure correct treatment.
- Be alert to fraud; verify all unexpected payments and respond swiftly to discrepancies.
This knowledge isn’t just for accountants or business owners. Anyone receiving federal disaster assistance benefits from understanding what SBAD TREAS 310 means and acting wisely.
Final Thought: The Tale of Two Payments
Many businesses recall receiving two distinct SBAD TREAS 310 payments: a smaller initial advance—free money—and a larger, repayable loan later. This two-step process reflects how the government prioritized speed and sustainability—first, immediate relief; then, longer-term support.
It’s a nuanced but clever approach, helping countless companies and individuals weather storms without drowning in debt. So, next time you see SBAD TREAS 310 on your statement, you’ll know it’s more than a cryptic code—it’s a lifeline coded into your financial history.
What does the SBAD TREAS 310 MISC PAY label mean on my bank statement?
It indicates a payment from the U.S. Department of the Treasury linked to the Small Business Administration (SBA). Usually, it’s an Economic Injury Disaster Loan (EIDL) advance or grant related to disaster relief.
Are SBAD TREAS 310 payments grants or loans?
The initial SBAD TREAS 310 payments are grant advances that do not require repayment. Later payments connected to the EIDL are loans you must repay over about 30 years.
Why might I see two different SBAD TREAS 310 payments?
Many businesses received two payments: a smaller, free grant advance first, then a larger loan payment later. The initial advance helped offset losses and did not need to be paid back.
How can I verify the legitimacy of an SBAD TREAS 310 payment?
Check that the payment matches SBA records or official communication. Be cautious of fraud, especially since some scams imitate SBA EIDL payments labeled ‘SBAD TREAS 310’.
Is the SBAD TREAS 310 payment taxable income?
The EIDL loan portion is excluded from taxable income following CPA guidance. Funds used to pay contractors or business expenses are generally not considered taxable income.

Small Business
Vitamin Business Opportunity: Market Growth, Models, and Profit Strategies

Exploring the Vitamin Business Opportunity

The vitamin business opportunity lies in a rapidly growing global market with high demand, flexible regulatory requirements, and multiple viable business models. Entrepreneurs can capitalize on market expansion, diverse product lines, and evolving consumer needs. This industry offers several profitable avenues backed by solid growth trends and consumer health awareness.
Market Growth and Demand Dynamics
The global dietary supplement market reached a size of $167.5 billion in 2023. Experts predict a steady compound annual growth rate exceeding 7%, potentially pushing the market near $240 billion by 2028. This surge springs primarily from dietary gaps and immune health concerns. Many consumers turn to vitamins to offset nutritional deficiencies and improve wellness.
- Unhealthy diets drive persistent demand for supplements.
- Vitamins appeal to a wide demographic aiming to enhance immunity.
This expansive market creates fertile ground for newcomers and established brands alike.
Regulatory Landscape Advantages
The Dietary Supplement Health and Education Act (DSHEA) of 1994 significantly eased entry barriers by not requiring FDA approval for vitamin products. Instead, the FDA focuses on removing unsafe or illegal supplements after reaching the market. Entrepreneurs benefit from reduced regulatory hurdles but must remain vigilant about compliance to maintain credibility and safety.
| Aspect | Detail |
|---|---|
| FDA Approval | Not mandatory before sales |
| FDA’s Role | Identifies and removes unsafe/illegal products |
| Recommended | Stay updated on supplement laws |
Vitamin Business Ideas and Models
Launching a Private Vitamin Brand
Vitamins do not require FDA approval before sale, easing brand launch processes. Entrepreneurs can develop lines focusing on quality and organic ingredients to align with current trends. Starting with low-demand products reduces competition and can unlock untapped niches.
- Options include gummy vitamins, vitamin-infused drinks, and other innovative formats.
- White-label services simplify brand establishment by providing ready-made formulations.
Subscription Box Business
Regular supplement intake by consumers supports subscription box models that deliver monthly vitamins. Customization based on individual health needs enhances retention. Offering additional services like physician consultations strengthens customer trust.
- Wholesale pricing benefits improve margins.
- Add complementary products like skincare and medical supplies.
Pet Vitamin Products
The pet supplement segment focuses on animal health needs. Livestock and dairy farm operators often purchase supplements in bulk. Animal feed producers incorporate protein powders and vitamins as ingredients.
Supplements Retail Store
Entrepreneurs can operate online or physical specialty stores focusing on dietary supplements. In-person stores provide improved customer service and expert advice. Online dropshipping offers low startup cost and operational flexibility.
- Additional sales include protein snacks, workout gear, and gym apparel.
Steps to Pursue a Vitamin Business Opportunity
- Research: Study the niche, competitors, and compliance requirements. Consult legal experts.
- Planning: Develop a business plan incorporating goals, finances, risk management, and marketing.
- Partnerships: Secure reliable distributors and explore collaborations with gyms or health professionals.
- Marketing: Target audiences via social media, bundle offerings, and distinctive packaging.
- Adaptation: Use customer feedback to refine products and respond to market trends.
Profitability and Industry Potential
Vitamin businesses enjoy profit margins typically ranging from 30% to 50%. The large base of supplement users—about 75% of U.S. adults have taken supplements by 2020—sustains strong demand. The global market’s size and growth potential are compelling incentives for investment.
Main Product Categories
- Multivitamins
- Standalone vitamins
- Probiotics
- Mineral supplements
- Fatty acids
Wholesale Buying and Platform Support
Purchasing vitamins wholesale allows sellers to earn a retail margin. Platforms like BlueCart help connect suppliers with thousands of potential buyers. Automation tools on such platforms streamline order management and improve operational efficiency.
Key Takeaways
- The vitamin market is growing fast and forecasted to reach nearly $240 billion by 2028.
- FDA approval is not required for vitamin sales but regulatory compliance remains critical.
- Business models include private brands, subscription boxes, pet supplements, and retail stores.
- Profit margins typically range from 30% to 50%, with high consumer demand sustaining sales.
- Thorough research, solid planning, partnerships, and adaptable marketing drive success.
- Wholesale buying and digital platforms facilitate supply chain optimization and sales growth.
Unlocking the Vitamin Business Opportunity: Your Guide to a Thriving Supplement Venture
Is jumping into the vitamin business a smart move today? Absolutely. The dietary supplement market is booming, creating multiple doors for entrepreneurs ready to seize the opportunity.
Let’s dive into why this industry shines, what you need to know before you get started, and how you can craft a venture that’s both profitable and sustainable.
Why the Vitamin Business Market Is Buzzing
The vitamin and dietary supplement landscape has transformed dramatically over recent decades. Driven by a worldwide surge in wellness awareness, it’s a goldmine of possibilities. The global market clocked in at a staggering $167.5 billion in 2023 and is forecasted to climb toward $240 billion by 2028, maintaining an impressive growth rate above 7% annually.
Why such high demand? It boils down to people’s health habits. Many consume unbalanced diets or battle weakened immune systems, relying on supplements to fill nutritional gaps. This persistent need keeps the market humming, ensuring steady consumer interest and repeat business.
Navigating the Regulatory Maze
Thinking of launching your vitamin line? Good news: you don’t need FDA approval before selling dietary supplements. The passage of the Dietary Supplement Health and Education Act (DSHEA) in 1994 paved the way for a proliferation of supplement products, significantly loosening regulatory hurdles.
That said, there’s no free pass. The FDA retains authority to remove products deemed unsafe or falsely advertised. So, compliance with labeling and safety regulations remains essential. Hiring a legal expert to steer you through the specifics isn’t just a suggestion—it’s smart business.
Creative Business Models to Consider
The vitamin business isn’t a one-size-fits-all arena. There’s a buffet of options depending on your passion, capital, and market insight.
- Starting Your Own Brand: With no FDA pre-approval required, launching a brand is accessible. Focus on quality and organic ingredients to capture trend-conscious consumers. Starting with lower-demand products can reduce competition and boost your chances. Innovative twists, like gummy vitamins or vitamin-infused beverages, can differentiate your offerings. White-label options simplify brand creation by letting you rebrand existing products.
- Subscription Boxes: Supplements thrive on regular usage. Offering a subscription service taps into this, delivering customized vitamins right to consumers’ doors. Adding perks like free consultations with physicians adds value, making customers stick around. Plus, buying wholesale allows for attractive margins. Throwing in medical supplies or skincare items can widen appeal and increase revenue streams.
- Pet Vitamins: Don’t forget our furry friends! The animal supplement market is sizable and growing. Businesses in animal husbandry or dairy farming look for wholesale supplement supplies to boost livestock health. Similarly, animal feed manufacturers integrate supplements like protein powders into their products. Pet vitamins offer a unique angle in this space.
- Supplement Stores: Whether online or physical, specialty stores cater to customers seeking personalized advice and immediate purchases. Brick-and-mortar outlets shine with their customer service edge. Online stores can leverage dropshipping for lower startup costs and greater flexibility. Selling complementary products such as protein bars, workout gear, and gym apparel can enhance profits.
Five Phases to Launch Your Vitamin Business Successfully
Before you pour cash into bottles and labels, follow these phases for a well-rounded start.
- Research: Comprehensive niche and competitor analysis is your foundation. You also need a thorough understanding of all legal regulations. Hiring a professional lawyer knowledgeable in dietary supplement law is often worth the investment.
- Planning: A detailed business plan guides you. Outline your goals, financial forecasts, marketing strategy, and potential risks. Consider a risk management plan to navigate inevitable bumps.
- Partnerships: Secure reliable distributors early. Collaborate with related businesses like gyms or fitness coaches who can help push your product through consignment deals. Early B2B sales can fund your next steps.
- Marketing: Marketing isn’t just helpful—it’s crucial. Pinpoint your audience, leverage social media, and design eye-catching packaging that complies with the law. Offer bundle deals and discounts to attract customers initially and keep them coming back.
- Adapt and Improve: The market never stands still. Constantly adjust to changing consumer needs and new trends. Customer feedback is your treasure trove for product improvement and customer satisfaction.
What Makes Vitamin Businesses Profitable?
The economics of this industry are enticing. Typical profit margins hover between 30% and 50%. Combine this with broad market demand—statistics show around 75% of U.S. adults tried dietary supplements at least once in 2020—and you’ve got powerful market potential. An expanding audience and high repeat purchase behavior create a rock-solid business foundation.
Core Products to Include in Your Portfolio
Knowing what to sell helps streamline your efforts. The big five product categories generally include:
- Multivitamins
- Standalone vitamins (like Vitamin D or C)
- Probiotics
- Mineral supplements
- Fatty acids (Omega-3, for example)
Hitting these categories covers a wide spectrum of consumer needs and preferences.
Boosting Your Vitamin Venture with Wholesale and Technology
Buying wholesale improves your cost efficiency, allowing you to sell at retail prices competitively. Platforms like BlueCart simplify the supply chain by connecting you with thousands of suppliers and customers. Their tools also automate repetitive tasks, helping you focus on growth rather than admin headaches.
Final Thoughts: Is the Vitamin Business Opportunity Right for You?
With wellness booming and consumers hungry for supplements, it’s an exciting time to jump in. That said, success hinges on smart research, legal savvy, strong partnerships, and savvy marketing. The opportunities stretch from niche organic brands to subscription models, pet supplements, and beyond.
So, is it time to invest your entrepreneurial energy into vitamins? If you’re ready for a blend of health passion, business grit, and customer focus, the market is wide open—and waiting.
What’s your next step?
What makes the vitamin business a growing opportunity?
The dietary supplement market is expanding rapidly. With over $167 billion in sales in 2023 and projected growth of 7% annually, demand for vitamins continues to rise globally.
Can I start a vitamin brand without FDA approval?
Yes, dietary supplements do not require FDA approval before selling. However, the FDA can remove unsafe products. Compliance with other regulations is necessary.
What are some viable vitamin business models?
- Launching a private label brand focusing on quality ingredients.
- Subscription box services offering customized supplements.
- Pet vitamin products for animal health markets.
- Supplements retail stores online or physical locations.
How critical is market research before starting a vitamin business?
Thorough research is essential. Understanding competitors, the target market, and legal regulations helps reduce risks and positions your business better.
What marketing strategies work best for vitamin businesses?
Social media marketing targeting health-conscious consumers is key. Partnering with gyms, fitness trainers, or influencers can boost brand visibility and sales.
Small Business
How Search Engine Marketing Enables Marketers to Display Ads on Websites
How Marketing Lets Marketers Place Ads on Websites with Search Engines
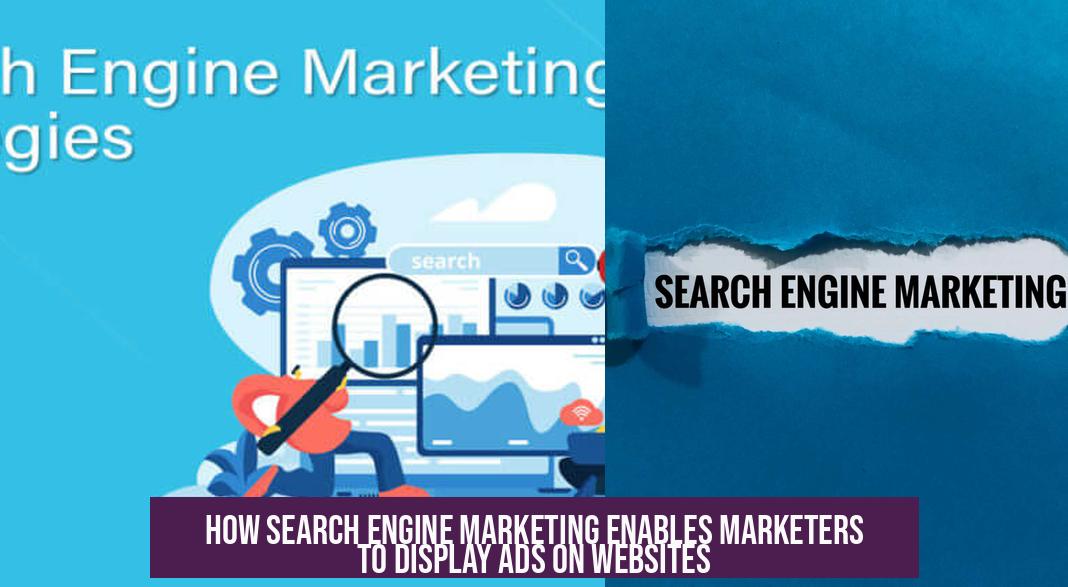
Marketing lets marketers place ads on websites with search engines through Search Engine Marketing (SEM), a paid digital advertising method that helps businesses appear prominently on search engine results pages (SERPs). SEM drives visibility by bidding on relevant keywords and displaying ads when users enter search queries tied to those words. This method uses a pay-per-click (PPC) model where marketers pay only when a user clicks an ad.
Understanding Search Engine Marketing (SEM)
SEM is the process of boosting a brand or product’s visibility in search engines like Google, Bing, or Yahoo through paid ads. It focuses on placing ads in response to user search queries, giving businesses a chance to reach potential customers actively searching for products or services they provide.
- Advertisers bid on keywords related to their offering.
- Ads appear alongside organic search results, typically at the top or bottom.
- SEM strictly involves paid ads, distinguishing it from search engine optimization (SEO), which targets unpaid, organic search rankings.
How SEM Works — The Mechanics
Advertisers enter an ad auction on the search engine platform. Google Ads, for example, evaluates ads based on two main factors: bid amount and Quality Score. Quality Score measures an ad’s relevance to the targeted keyword and overall user experience on the landing page.
Ad placement depends on:
- Keyword Relevance: Ads match the user’s search terms to ensure alignment.
- Bid Value: The amount an advertiser is willing to pay per click influences ad rank.
- Quality Score: Higher scores reduce cost-per-click (CPC) and improve ad position.
Advertisers can target audiences intricately by location, device type, and time of day or week, making SEM flexible and precise.
The Role of SEM in Marketing Strategies
SEM helps businesses show ads to users when they have high intent to purchase. This intent-driven method is beneficial for:
- Small, medium, and large businesses.
- Immediate exposure to potential customers.
- Driving website traffic and increasing leads or sales.
Using SEM, marketers place ads that appear on search engine results pages and other websites affiliated with the search engine’s advertising network, connecting products and services directly with interested users.
Benefits of Using SEM for Advertisement
- Targeted Reach: Ads appear to users based on keywords, geography, device, and time.
- Pay-Per-Click Model: Advertisers pay only when a user clicks an ad, optimizing the ad spend.
- Real-Time Adjustments: Campaigns can be modified or paused instantly based on performance data.
Key Components of SEM Ads
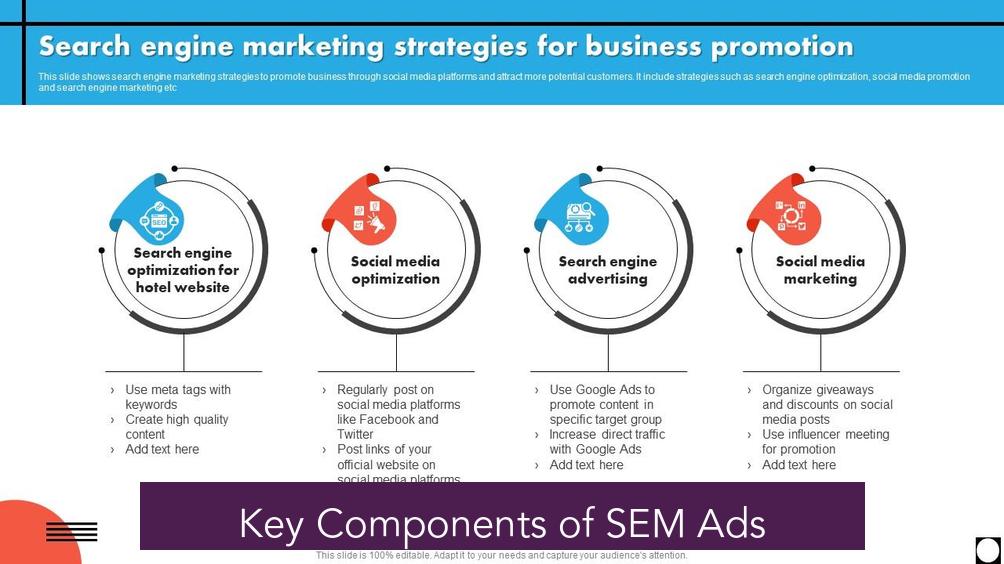
| Component | Description |
|---|---|
| Headline | The clickable blue text users see on search results |
| Description | Short text below the headline providing details |
| Extensions | Additional links or call-to-action buttons |
| Landing Page | The web page users are directed to after clicking the ad |
Proper keyword research is critical for SEM success. Tools such as Semrush, Google Ads Keyword Planner, and Google Trends help marketers identify valuable keywords and analyze competition and trends.
SEM Platforms and Comparison with SEO
- Platforms: Google Ads is the leading platform, with Microsoft Advertising and Yahoo! Native as alternatives.
- SEM vs. SEO: SEM buys ad placements for immediate traffic, while SEO is a longer-term strategy to improve organic rankings without direct payment for placements.
Costs and Budgeting for SEM
SEM budgets vary widely based on goals and industries. Small campaigns might cost around $500 monthly, while larger efforts exceed $10,000. The cost per click ranges from $2 to over $55 depending on keyword competition and industry.
Marketers can adjust spending throughout campaigns to optimize ROI. High competition keywords require higher bids to appear on the first page of search results.
Key Takeaways
- SEM allows businesses to place pay-per-click ads on search engine results and associated websites.
- Advertisers bid on keywords, with ad rank influenced by bid and Quality Score.
- Targeting options include location, device, and time, increasing ad precision.
- SEM provides measurable, flexible campaigns that can be adjusted in real time.
- Cost varies by industry and keyword competitiveness, with budgets ranging from hundreds to thousands monthly.
How Marketing Lets Marketers Place Ads on Websites with Search Engines
Marketing that lets marketers place ads on websites with search engines is known as Search Engine Marketing (SEM). It involves placing paid advertisements on search engines like Google or Bing to help businesses get in front of potential customers when they are actively searching. SEM makes sure ads show up where and when users are looking for products or services, driving traffic and sales in a highly targeted and cost-efficient way.
Now, let’s unravel the nuts and bolts of this fascinating world where ads meet search engines—and why it’s vital for any business hoping to thrive online.
What Exactly Is Search Engine Marketing?
Search Engine Marketing, or SEM, is a strategy that uses paid advertising to boost your visibility on search engine results pages (SERPs). Unlike SEO, which focuses on organic ranking through website optimization, SEM buys prime ad real estate through paid placements.
SEM targets specific keywords that people type into search engines. When you bid on these keywords, your ad could appear above or alongside organic results, shining bright like a lighthouse amid the ocean of search results.
Here’s a quick fact: SEM used to cover both organic and paid strategies, but these days, it’s strictly the paid side of things, where you pay every time a user clicks your ad—known as pay-per-click (PPC).
Why Is SEM a Big Deal for Marketers?
Picture this: customers searching for the exact product or service you offer. SEM helps place your ads precisely at that moment. It’s like waving a flag saying, “Hey, I’m right here!” on the busiest street in your target market.
Search engines have become the primary way people discover new stuff online. Without a strong SEM strategy, your business is hiding in plain sight—or worse, invisible. SEM is crucial because it gets your brand noticed with laser-focused targeting and measurable results.
What’s more, you only pay when someone clicks your ad. That means you’re spending your dollars efficiently, reaching people who already have the intent to buy or learn more.
The Perks of Placing Ads via SEM
SEM offers some compelling advantages that make it a go-to marketing technique:
- Intent-Driven Advertising: Because users are actively searching, your ads meet them with high intent. It’s like catching fish right when they’re hungry instead of casting in empty water.
- Speedy Results: Unlike SEO, which takes time to build organic traction, SEM can drive visible traffic almost immediately. Great for startups or new product launches.
- Real-Time Control: You get instant data on ad performance. If a campaign flops, turn it off instantly. No sunk cost syndrome here.
- Precise Targeting: Beyond keywords, you can target by location, device types, time of day, and even seasons. Imagine your ad popping only when your audience is sipping coffee at 9 AM on a Tuesday.
What’s Inside a Search Ad?
Wonder what an actual search ad looks like? It’s simpler than you think but powerful:
- Headline: The clickable blue title that grabs attention.
- Description: A brief text snippet that highlights your offer or message.
- Extensions: Extra links or actions, like phone calls or location info, inviting more engagement.
- Landing Page: Where users land after clicking—make sure this page seals the deal!
The headline hooks them, the description persuades them, and the landing page closes the deal. This is SEM’s magic pipeline working seamlessly.
How Does SEM Work Behind the Scenes?
Amazing as it sounds, placing these ads isn’t random. SEM follows a precise process:
- Keyword Research: Marketers find popular, relevant search terms their potential customers use.
- Bid on Keywords: Advertisers enter ad auctions, offering money for placements tied to those keywords.
- Quality Score: Google evaluates ads based on relevance and usefulness. The better your ad fits the keyword, the higher the score, which means lower costs per click (CPC).
- Ad Placement: Google picks winners for slots based on Quality Score and bid price.
Think of it like an auction but with a twist: you pay for clicks, not just views. Even winning your bid won’t get you the top spot if your ad is off-topic or poorly constructed.
How Much Does SEM Cost?
Curious about the price tag? SEM budgets can vary as widely as your neighbor’s taste in home décor—from a modest $500 up to $10,000+ per month depending on competition.
Some industries have sky-high costs per click—think legal or insurance sectors where CPC can soar past $50! Others enjoy bargain rates around $2.
The secret sauce? Keyword competitiveness. If everyone wants the same search term, prices skyrocket. Sometimes you’ll spend more to outbid competitors just to sit on page one.
Tools of the Trade: Helping Marketers Play the SEM Game
Luckily, marketers aren’t flying blind into the SEM jungle. A handful of savvy tools make lives easier, smarter, and more cost-efficient:
- Semrush: Offers end-to-end SEM management—from keyword digging to competitor spying.
- Google Ads Keyword Planner: Perfect for kicking off campaigns with targeted keyword ideas.
- Google Trends: See how keyword popularity changes over time to time your campaigns wisely.
These tools equip marketers to pick the right keywords, optimize bids, and analyze performance like seasoned pros.
How Does SEM Differ from SEO?
SEO and SEM often get tangled in the same conversation but they’re fundamentally different beasts:
- SEM: Paid ads that appear at the top or bottom of search results.
- SEO: Techniques to organically rank your website in search engine results, without paying for clicks.
SEO takes patience and effort. It’s like planting a tree and enjoying shade years later. SEM is turning on a searchlight instantly—but it costs per use.
So, which is better? Depends on your goals. Many savvy marketers combine both to maximize reach and balance short-term wins with long-term growth.
Is Google Ads the Same as SEM?
Not quite. Google Ads is the most popular platform for running SEM campaigns but SEM itself refers to the overall strategy and practice of paid search advertising.
Think of SEM as the game, and Google Ads as one of the playing fields. Other platforms exist too, like Microsoft Advertising and Yahoo! Native ads.
FAQs About Marketing on Search Engines
- Is Facebook SEM? No, Facebook is a social media marketing platform. SEM is specific to paid ads on search engines.
- Are SEM tools secure? Good question! Top SEM tools prioritize security with updates, intrusion detection, and data encryption.
Bottom Line: SEM Powers Targeted Website Advertising
So there you have it—marketing that lets marketers place ads on websites with search engines, aka SEM, is a cornerstone of modern digital marketing. It connects businesses to customers actively searching for what they need, using a smart, cost-effective paid advertising approach.
With its precise targeting, real-time measurability, and speedy results, SEM levels the playing field for businesses of all sizes who want to get noticed online. Plus, the combination of powerful tools and flexible budgets means marketers can tailor campaigns to squeeze every drop of value from their ad spend.
Whether you’re a start-up itching to get your name out there fast, or a giant ready to dominate search rankings, SEM offers an unbeatable way to place your ads exactly where your customers are looking. Have you tried SEM in your marketing mix yet? What’s holding you back?
What is search engine marketing (SEM) and how does it help place ads on websites?
SEM is paid advertising that boosts your brand’s presence in search engine results. It lets marketers place ads on search engines like Google, showing products or services when users search relevant keywords.
How does SEM use keywords to target potential customers?
SEM targets specific keywords related to your product or service. Ads appear when users search those words, with costs depending on keyword competitiveness and relevance, measured by Quality Score.
What is the pay-per-click model in SEM advertising?
In SEM, advertisers pay only when someone clicks their ad. This pay-per-click (PPC) system helps control costs and ensures budget is spent on actual customer engagement.
Can SEM ads be targeted by location and device?
Yes, advertisers can specify where, when, and on which devices their ads appear. Campaigns can be geo-targeted, device-targeted, or scheduled for specific times to reach the right audience.
How does SEM allow marketers to measure and adjust their ad campaigns?
SEM platforms provide real-time data on clicks and conversions. Marketers can track ad performance and quickly change or pause campaigns to improve results or cut losses.
Small Business
How to Leave a Google Review for a Business: Step-by-Step Instructions
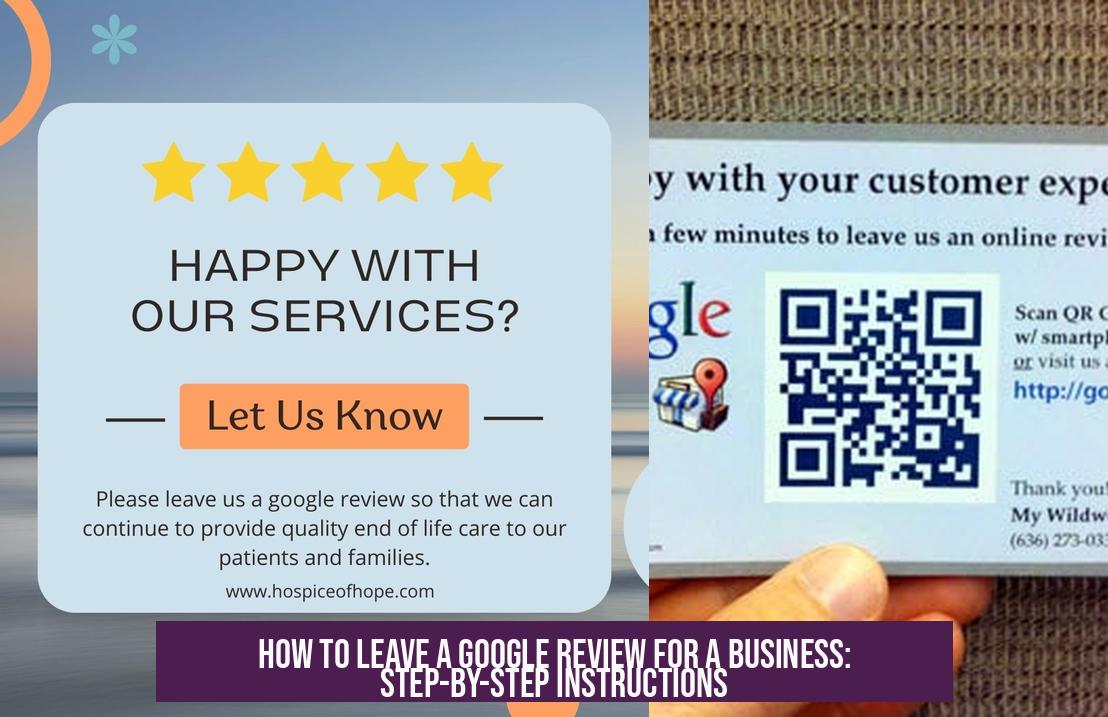
How to Leave a Review on Google for a Business
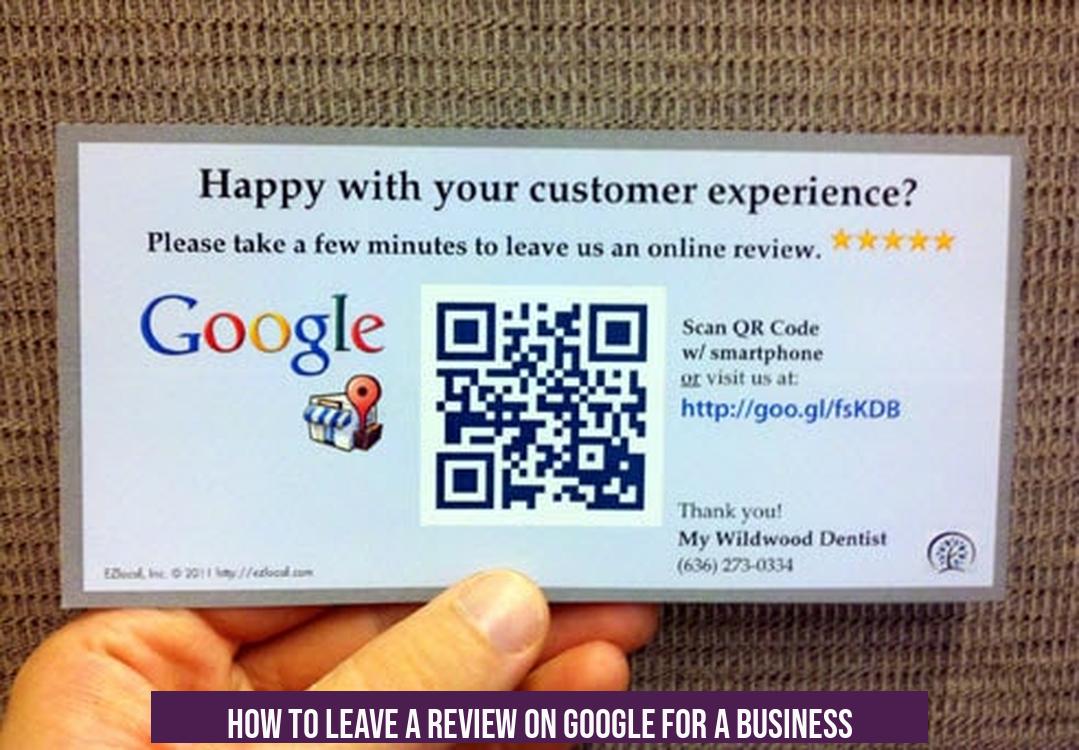
Leaving a review on Google for a business involves logging into your Google account, searching for the business, selecting the review option, giving a star rating, and writing your experience before submitting it. This process is simple and fast, enabling customers to share honest feedback that benefits both consumers and businesses.
What Are Google Reviews?
Google reviews provide verified customer opinions in one place, consolidating location, hours, phone details, and user feedback. Over 84% of consumers trust online reviews as much as personal suggestions from friends or family. Positive Google reviews can improve a business’s ranking in search results and attract more customers.
Step-by-Step Guide to Leave a Google Review
- Log in to Your Google Account:
Use the blue login button on the Google homepage’s top right to sign in. Enter your email and password. If you don’t have a Google account, you must create one first. - Find the Business:
Type the company name in the Google search bar or open Google Maps and locate the business. On mobile devices, open the business listing on Google Maps, then tap “Rate & write a report.” - Select “Write a Review”:
On the business profile, you will see existing star ratings and reviews. Click the button labeled “Write a review” to start your own. - Choose a Star Rating:
Rate from 1 star (poor service) to 5 stars (excellent). Each star level reflects your level of satisfaction. - Write Your Review:
Enter your experience or opinion in the text box. Describe your interaction clearly and honestly. - Submit Your Review:
Click “Publish” to post your review publicly on Google.
Important: Reviews written using the same device or network as the business may not display. This restriction helps prevent fake ratings.
Quick Guide Summary
- Log into Google or Google Maps.
- Search for the business.
- Scroll to “Write a Review.”
- Select star rating.
- Write your review.
- Click send or publish.
You’ve now contributed a Google review.
Why Timely Google Reviews Matter
Fast feedback helps businesses adjust quickly to customer needs. Writing a review takes moments unless you choose to write extensively. When customers know how to leave a Google review, businesses can encourage positive feedback effectively.
Additional Insights About Google Reviews
How to Get More Google Reviews
Encourage satisfied customers to write reviews. Ask politely after a good interaction or at purchase points. Incentives are discouraged by Google policies, so focus on genuine requests.
Can Non-Customers Leave Reviews?
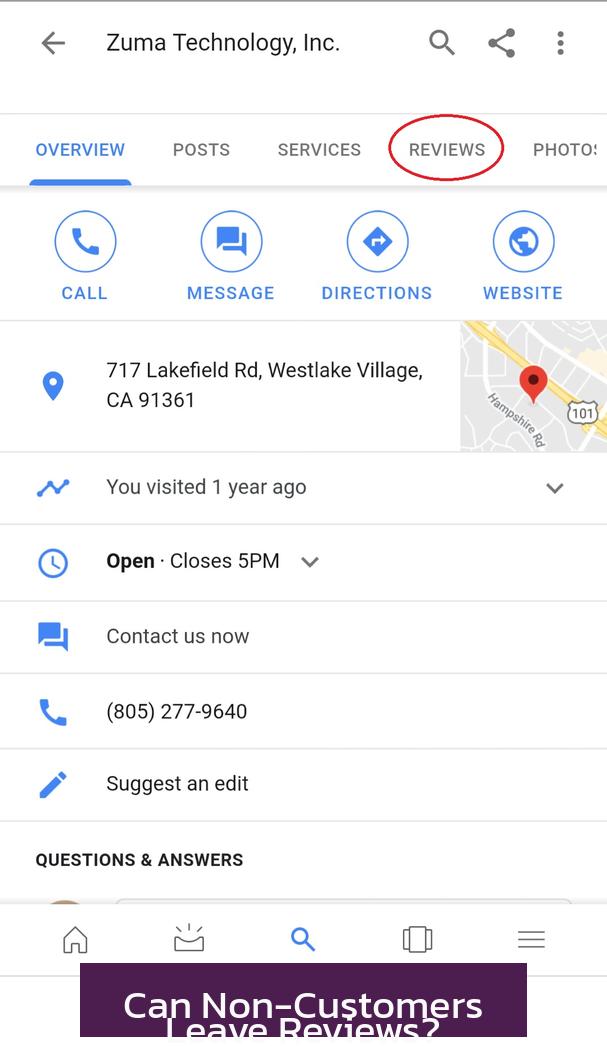
Generally, rating a business without using its services is not allowed and may result in removal of the review. For example, you cannot claim a poor haircut if you never visited the salon.
External Experience Reviews by Non-Customers
Non-customers can provide feedback based on indirect interactions, such as phone inquiries or website impressions, as long as the statements are truthful and factual. Examples include commenting on website usability or customer service responsiveness.
Summary: Key Points on Leaving Reviews
- Log into Google account first.
- Search the business on Google or Maps.
- Click “Write a review,” give stars, and write your feedback.
- Publish the review to share it publicly.
- Reviews from non-users based on false claims can be removed.
- Timely direct feedback helps businesses improve.
How to Leave a Review on Google for a Business: A Step-By-Step Guide
Want to share your thoughts about a business on Google but unsure where to start? How to leave a review on Google for a business is straightforward once you learn the steps. Google reviews pack a punch—they combine a business’s info, photos, hours, and feedback all in one place.
With 84% of consumers trusting online reviews as much as personal recommendations, your review can shape someone’s choice. Plus, businesses with positive reviews tend to rank higher on Google Search, getting them more customers (and more reasons for you to write those five stars!). Wondering how to make your review count and actually publish it? Let’s dive in.
Logging In: Your First Step to the Review Stage
First off, you need to be signed into your Google account. Don’t have one? No worries, it’s free and quick to set up. Just click the blue “Login” button in the top right corner of Google’s homepage, enter your email and password (or create a new account), and voila—you’re in.
Think of this as your virtual passport to the land of reviews. Google needs you logged in to ensure your feedback is legit and uniquely tied to a real person. This helps reduce fake reviews, although sometimes it can block genuine ones if, say, the business and reviewer share the same network or device.
Finding the Business You Wish to Review
Once logged in, fire up the search bar. Type the exact name of the business, restaurant, or attraction you want to review. Want to feel a bit more like a detective? Use Google Maps or the Google+ platform (yes, it’s still around in some fashion for reviews).
On a mobile device? Tap the service provider on Google Maps, then hit the button labeled “Rate & write a report.” It’s like knocking on their digital door and being invited inside to share your opinion.
Spotting the Right Spot: Writing Your Review
After searching, you’ll see the business’s profile pop up. Browse existing ratings and comments first for perspective. Found the right place? Click the “Write a review” button.
Here’s where the magic happens. The rating system has two parts:
- Stars: Click on 1 to 5 stars—1 means “not-so-great” and 5 means “wow, highly recommend.”
- Text field: Share a few lines or paragraphs about your experience. You’re the storyteller here. Feel free to mention anything from customer service to ambiance or product quality.
Done? Hit “Publish” to share your thoughts with the world (or at least with anyone who Googles the business). Just a heads-up: Reviews may sometimes fail to display if Google suspects a conflict of interest, like reviews written from the same IP network as the business, but that’s to keep things fair and genuine.
The Quick and Dirty Guide to Posting Your Review

- Open your web browser or Google Maps app on your phone.
- Sign in to your Google account.
- Search for the business you want to review.
- Scroll down to find “Write a Review” next to the Reviews and Add Photo buttons.
- Click “Write a Review”.
- Pick your star rating.
- Jot down your experience or opinion.
- Hit send and bask in the glory of having left your mark!
That’s it. No rocket science involved. Have you ever thought it’d be so simple to make a difference in a business’s online reputation?
Why Bother With Reviews? Why Is Quick Feedback So Important?
Leaving a Google review isn’t just about venting or praising—it’s about shaping real-time customer feedback. This info helps businesses improve and helps future customers make informed choices.
Plus, a speedy review after your visit helps keep your feedback fresh and relevant, which businesses love. It’s probably the easiest and fastest part for you as a reviewer; everything else is just celebrating your new Internet fame.
Frequently Asked Questions: Clearing Up Confusions About Google Reviews
How Can Businesses Get More Google Reviews?
It’s often simple: ask! Businesses that politely encourage happy customers to leave reviews usually see an uptick. Understanding what motivates customers to review helps tailor these requests to feel natural and welcome.
Can Non-Customers Leave Reviews?
Strictly speaking, no. Google expects a reviewer to be a genuine customer to prevent fake or misleading feedback. For example, someone can’t review a haircut if they didn’t get a haircut there—that’s fraudulent.
But Wait, Non-Customers Can Still Say Something?
Yes! If you never bought the product or service but interacted with the business, like asking questions or browsing their website, you can share your external experience. Maybe their website was confusing or an email went unanswered. Your comments must be truthful, but this kind of feedback is allowed.
This adds nuance to reviews, reflecting the full picture of the business beyond just transactions.
Final Thoughts: Your Review Matters
Leaving a review on Google for a business is more than just clicking stars and typing. It’s a powerful act that influences future customers and drives businesses to improve. The process is simple, fast, and gives your voice a platform. Next time you have a memorable experience, good or bad, why not take a minute to share it?
Does the idea of influencing a business’s future sound exciting? Have you ever left a review that changed how others thought about a place? Your next review might just be the one that helps a great business shine or nudges another toward better customer care.
How do I start leaving a Google review for a business?
First, log in to your Google account. If you don’t have one, create a new account. Then, search for the business using Google Search or Google Maps. When you find it, click “Write a review” on its profile.
What steps should I follow to submit my review?
- Select the star rating from 1 to 5.
- Write your opinion in the text field.
- Click the “Publish” button to post your review.
Your review will appear on the business’s Google profile after publishing.
Can I leave a review if I am not a customer of the business?
Non-customers cannot post false claims as reviews. However, they can leave factual feedback about external experience, like website usability or customer service, as long as it is true and accurate.
Why might my Google review not be displayed?
If you use the same device or network linked to the business, your review may not show. This helps prevent fake reviews and keeps the rating trustworthy.
How can a business encourage customers to leave Google reviews?
Businesses can ask satisfied customers directly to leave a review. Knowing why customers leave reviews helps improve the chances of getting positive feedback on Google.
-

 Career3 years ago
What is the lowest salary for a pharmacist?
-

 Small Business8 months ago
What Are the Costs Involved in Registering a Trademark and Key Factors to Consider
-

 Career3 years ago
Customer success manager career path
-

 Career3 years ago
What is the highest paying customer service?
-

 Career Path3 years ago
Is oilfield services/equipment a good career path
-

 Small Business8 months ago
Streaming Music in Malls: Strategies to Enhance Shopper Experience and Boost Business Performance
-

 Customer Service3 years ago
What is the highest paid customer service job?
-

 Customer Service3 years ago
Onsumer services a good career path

